Assignment
Model (raster, vector, 2D, 3D, render, animate, simulate, ...) a possible final project and post it on your class page.
Softwares Fusion 360 - Rhinoceros - AutoCAD - Adobe Photoshop and Illutrator
Use different 2D and 3D Softwares and draw (2D sketches,3D models, renders) for a potential idea of a final project.
Step I Fusion 360Basic Idea
Fusion 360 is a cloud-based CAD/CAM tool and it combines organic shapes modelling, mechanical design and manufacturing in one software.
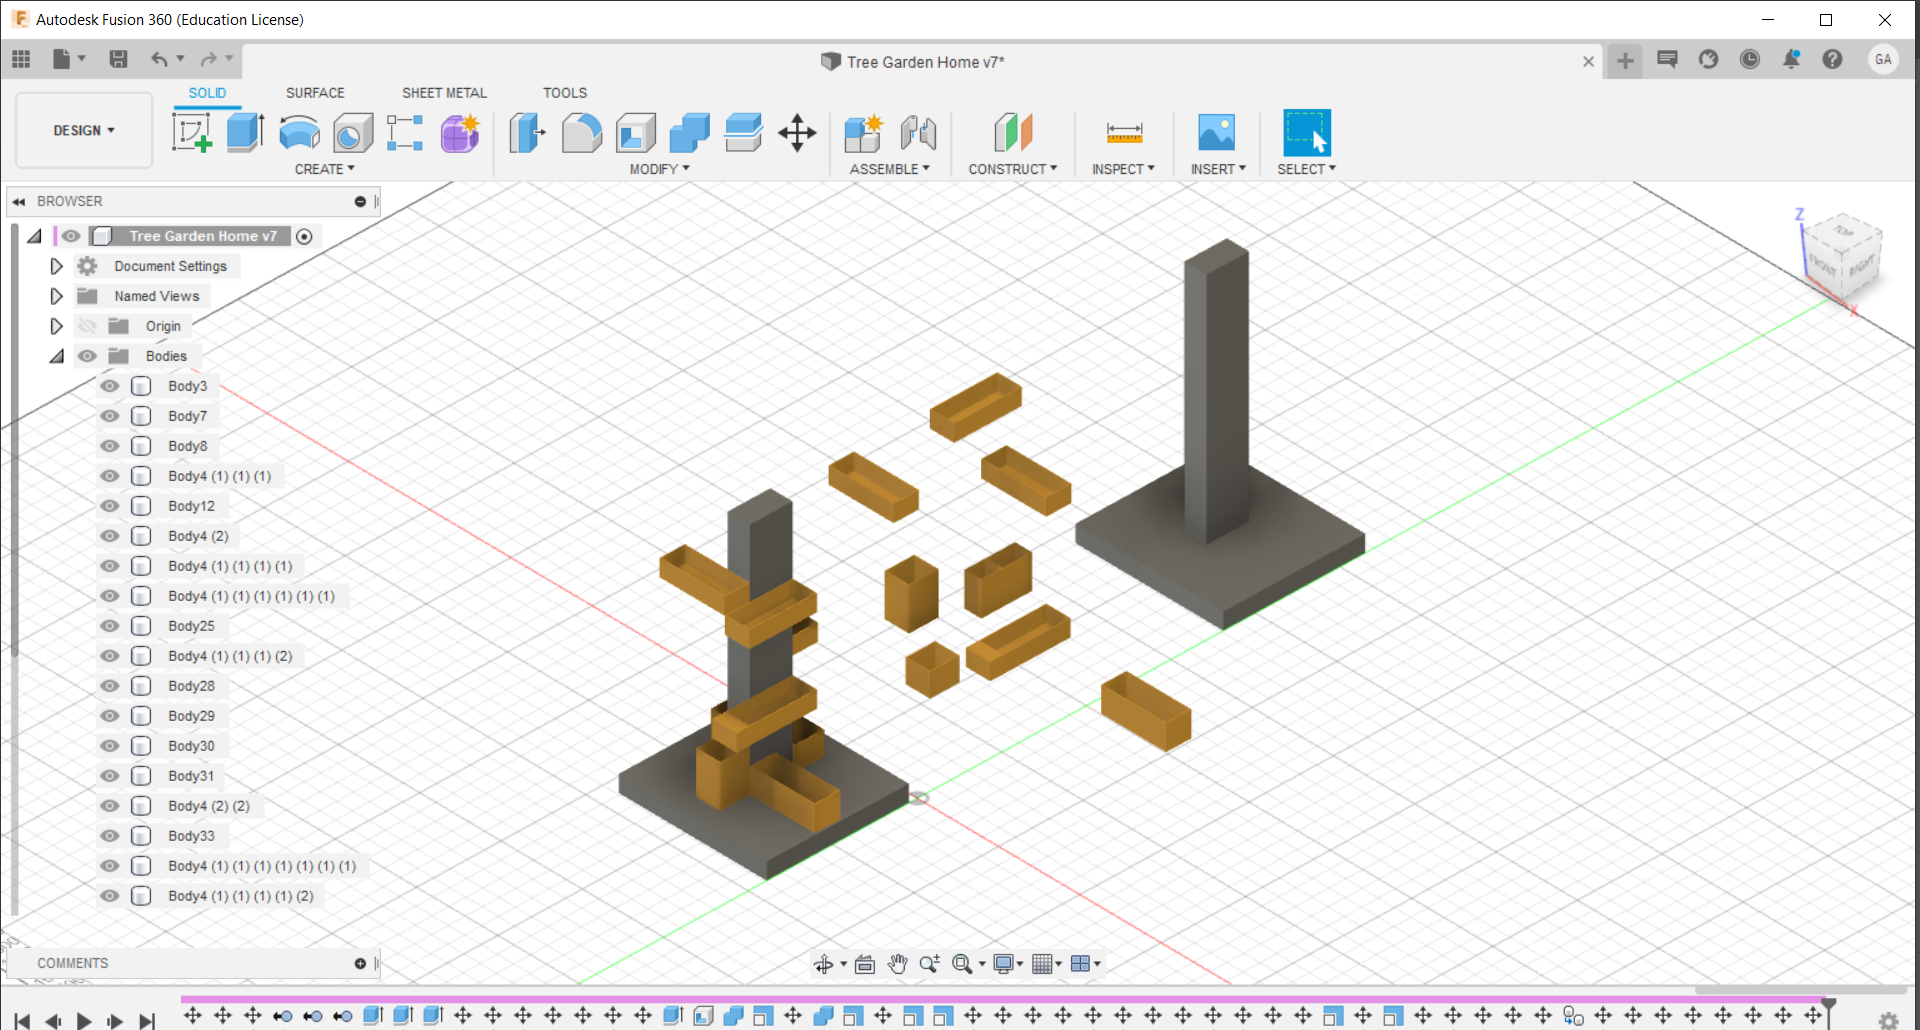
I used Fusion 360 3D modeling software to draw my basic idea in 3D using many 2D and 3D commands.
Some of the commands that I used are:
Sketch: line, rectangle
Split, trim, combine, move, copy
Extrude and many others
Also I changed between different display modes in order to visualize the project in a good way.
Wireframe
Shaded
Rendered
I modeled each part alone dividing them into different bodies to make it easy for me to manipulate and put different settings for each part alone.
Then I combined the parts to have a full 3D model.
Finally I exported the file as a .dwg so I can open it in AutoCAD.
Step II AutoCADBasic Idea
AutoCAD is a computer-aided desin (CAD) and drafting software, used by architects, project managers, engineers, graphic designers, city planners and other professionals.
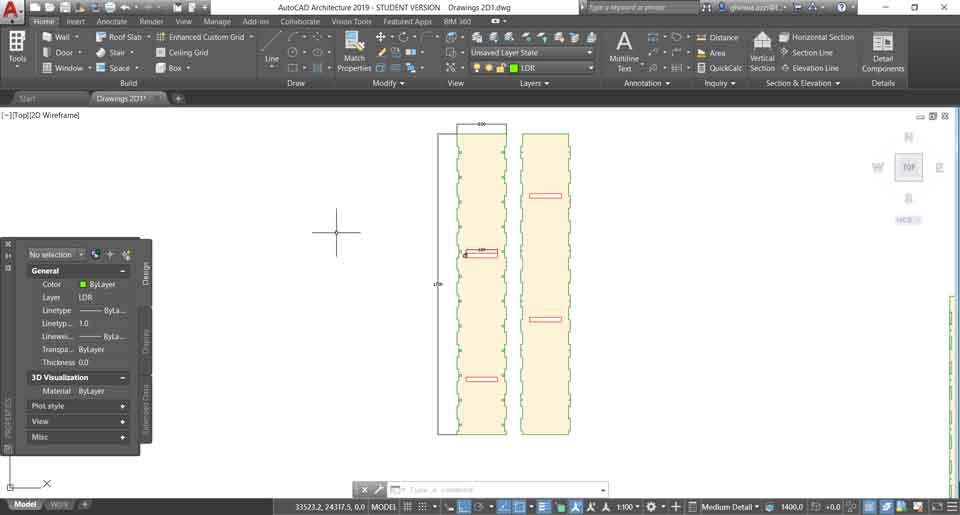
I opened the 3D file in AutoCAD 2D and 3D modeling software to start drawing my basic idea in 2D with approximate dimensions.
I oriented the model into the front view and used the command flatshot to have a 2D line drawing.
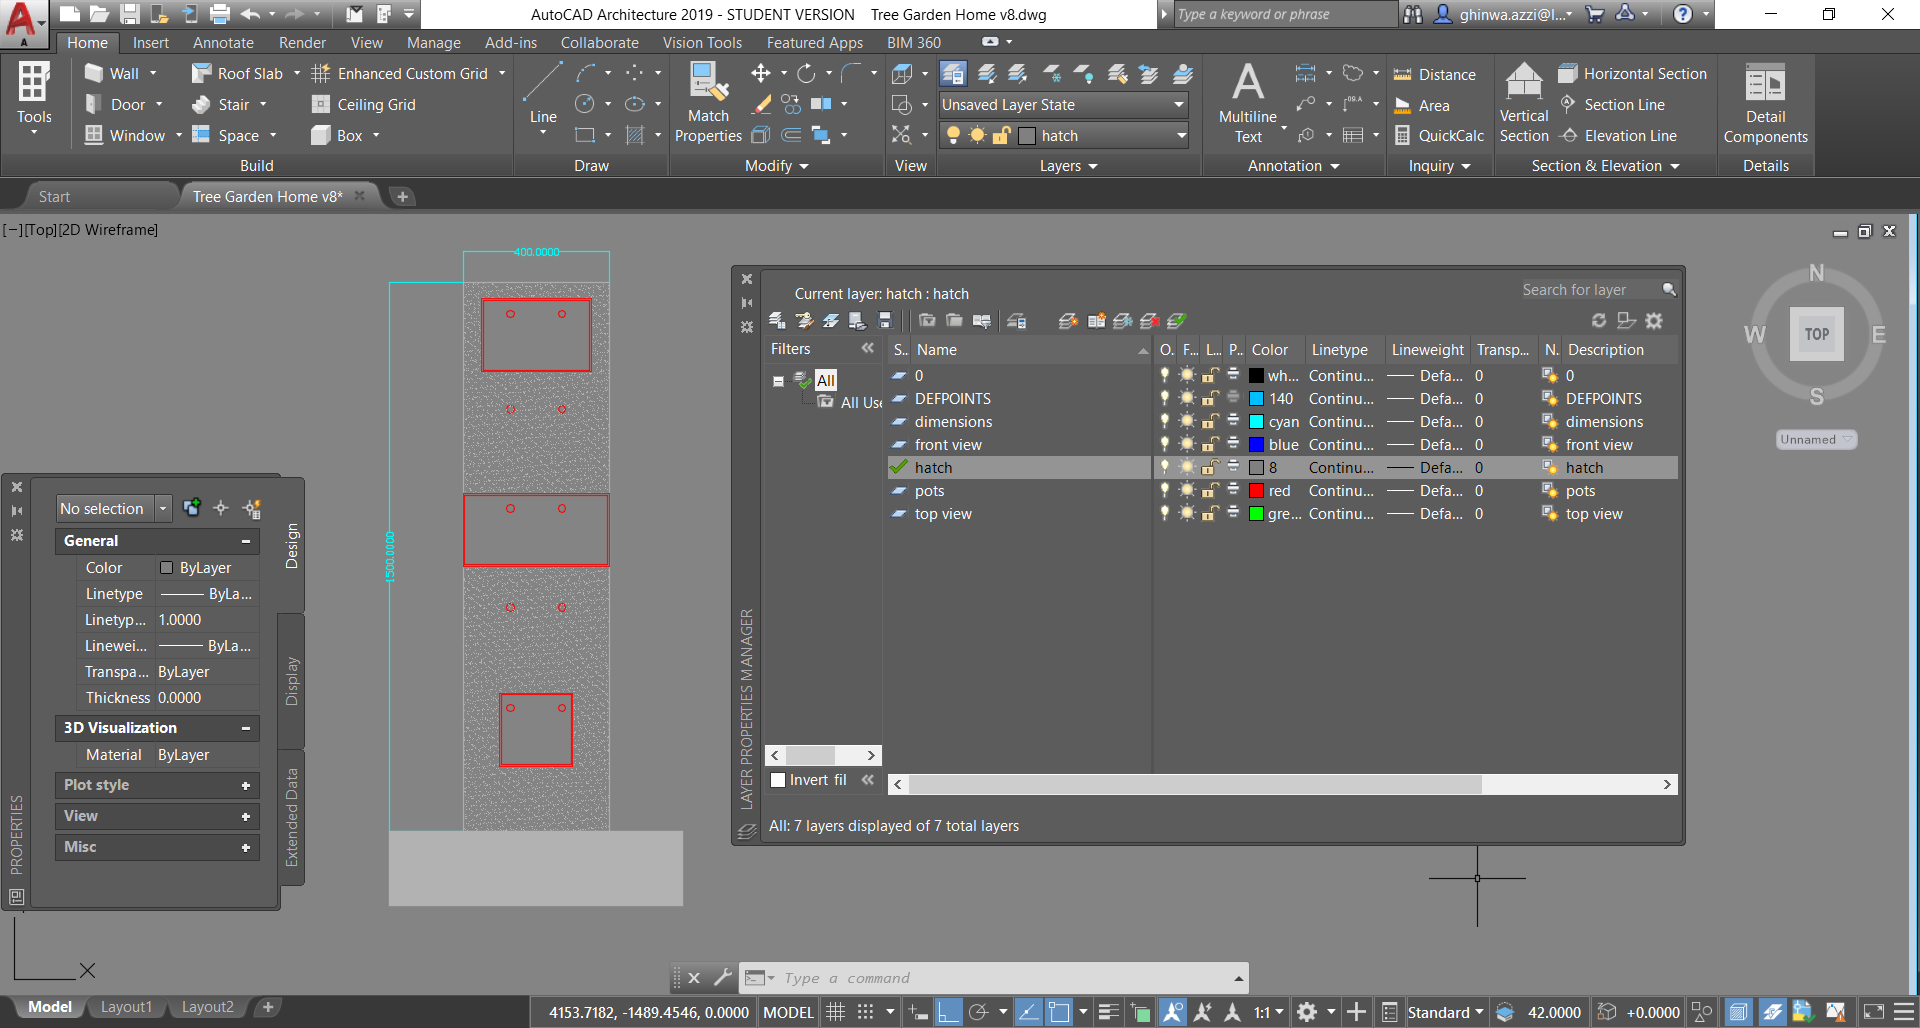
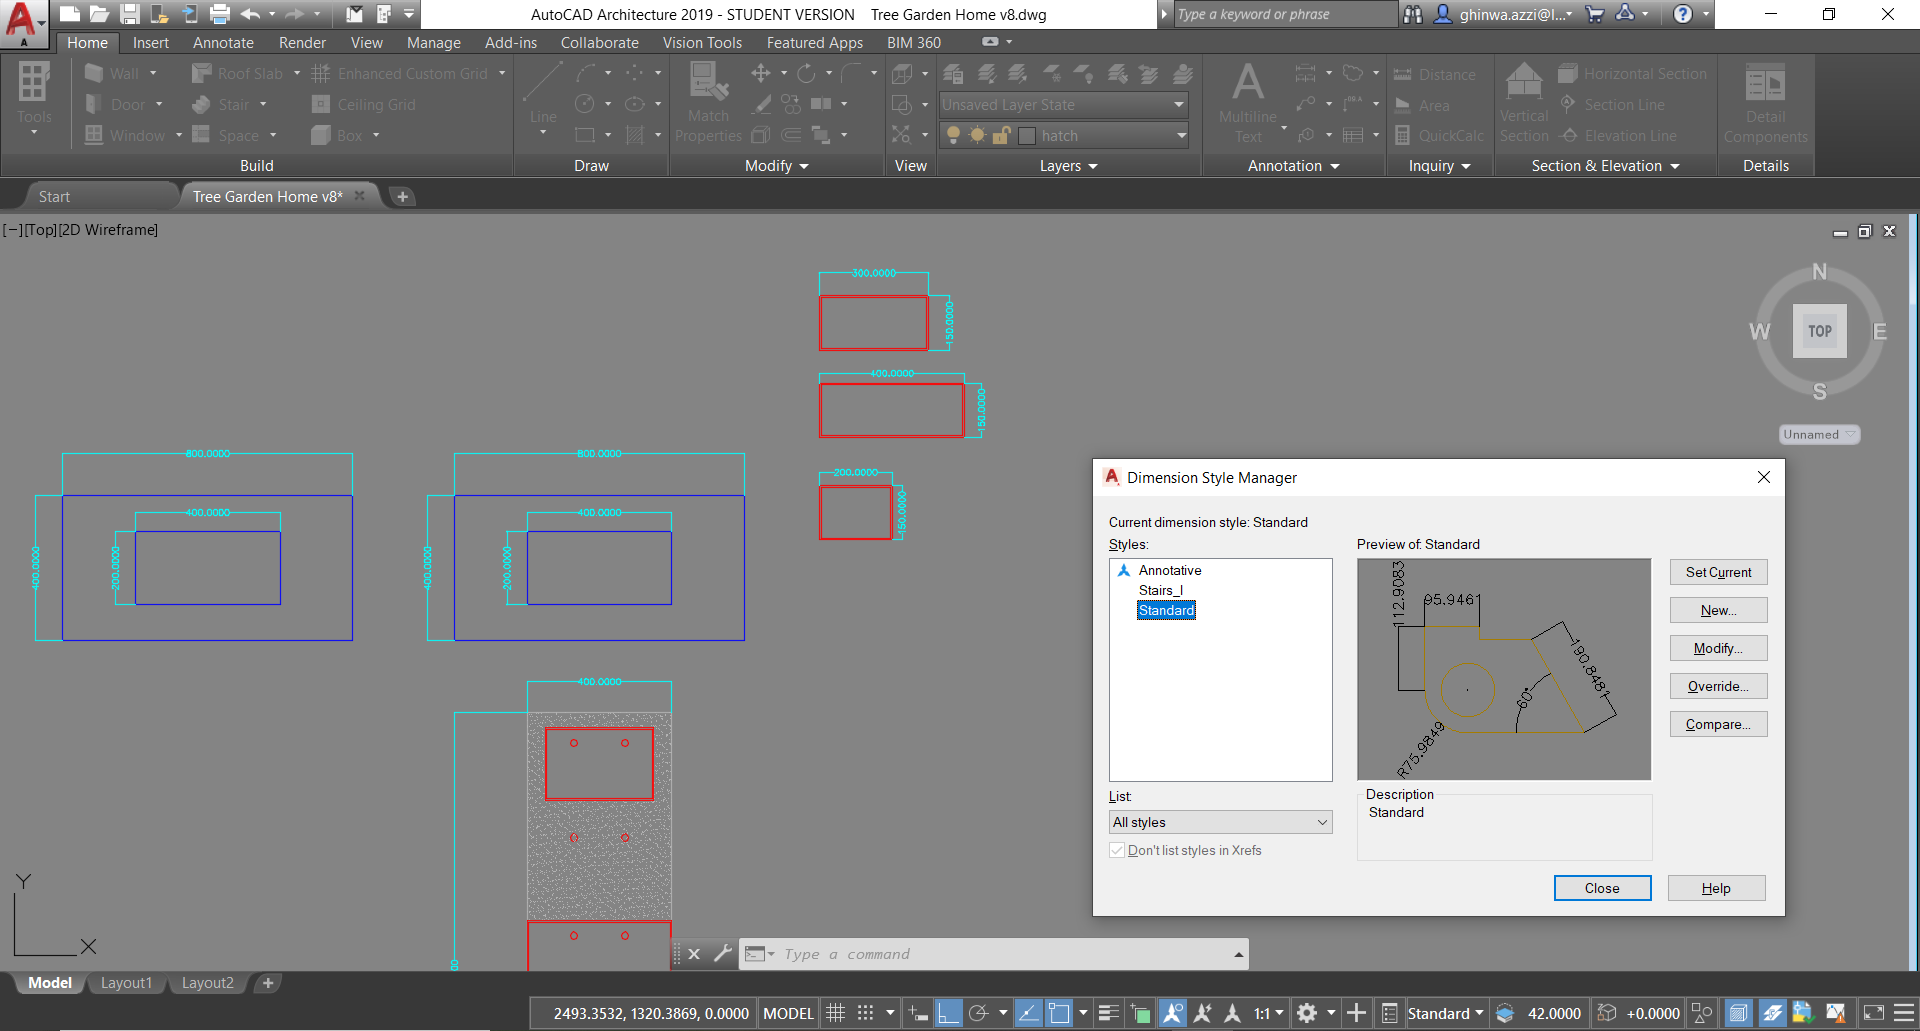
In phase two I scaled the 2D drawing and started dividing the layers.
Then I started assigning the dimensions using dimlinear command and changed the dimnsions style (font, text height ...) in the dimensions style manager.
After adding the dimensions I started adding hatches to differentiate the different parts of the project.
Some of the commands that I used are:
Sketch: line, rectangle, layer properties manager, dimension style manager
Split, trim, combine, move, copy, rotate, fillet, wipeout
hatch, dimlinear, extrude, presspull and many others
Developed Idea
Step III Adobe PhotoshopAdobe Photoshop is the predominant photo editing and manipulation software on the market. Its uses range from the full-featured editing of large batches of photos to creating intricate digital paintings and drawings that mimic those done by hand.
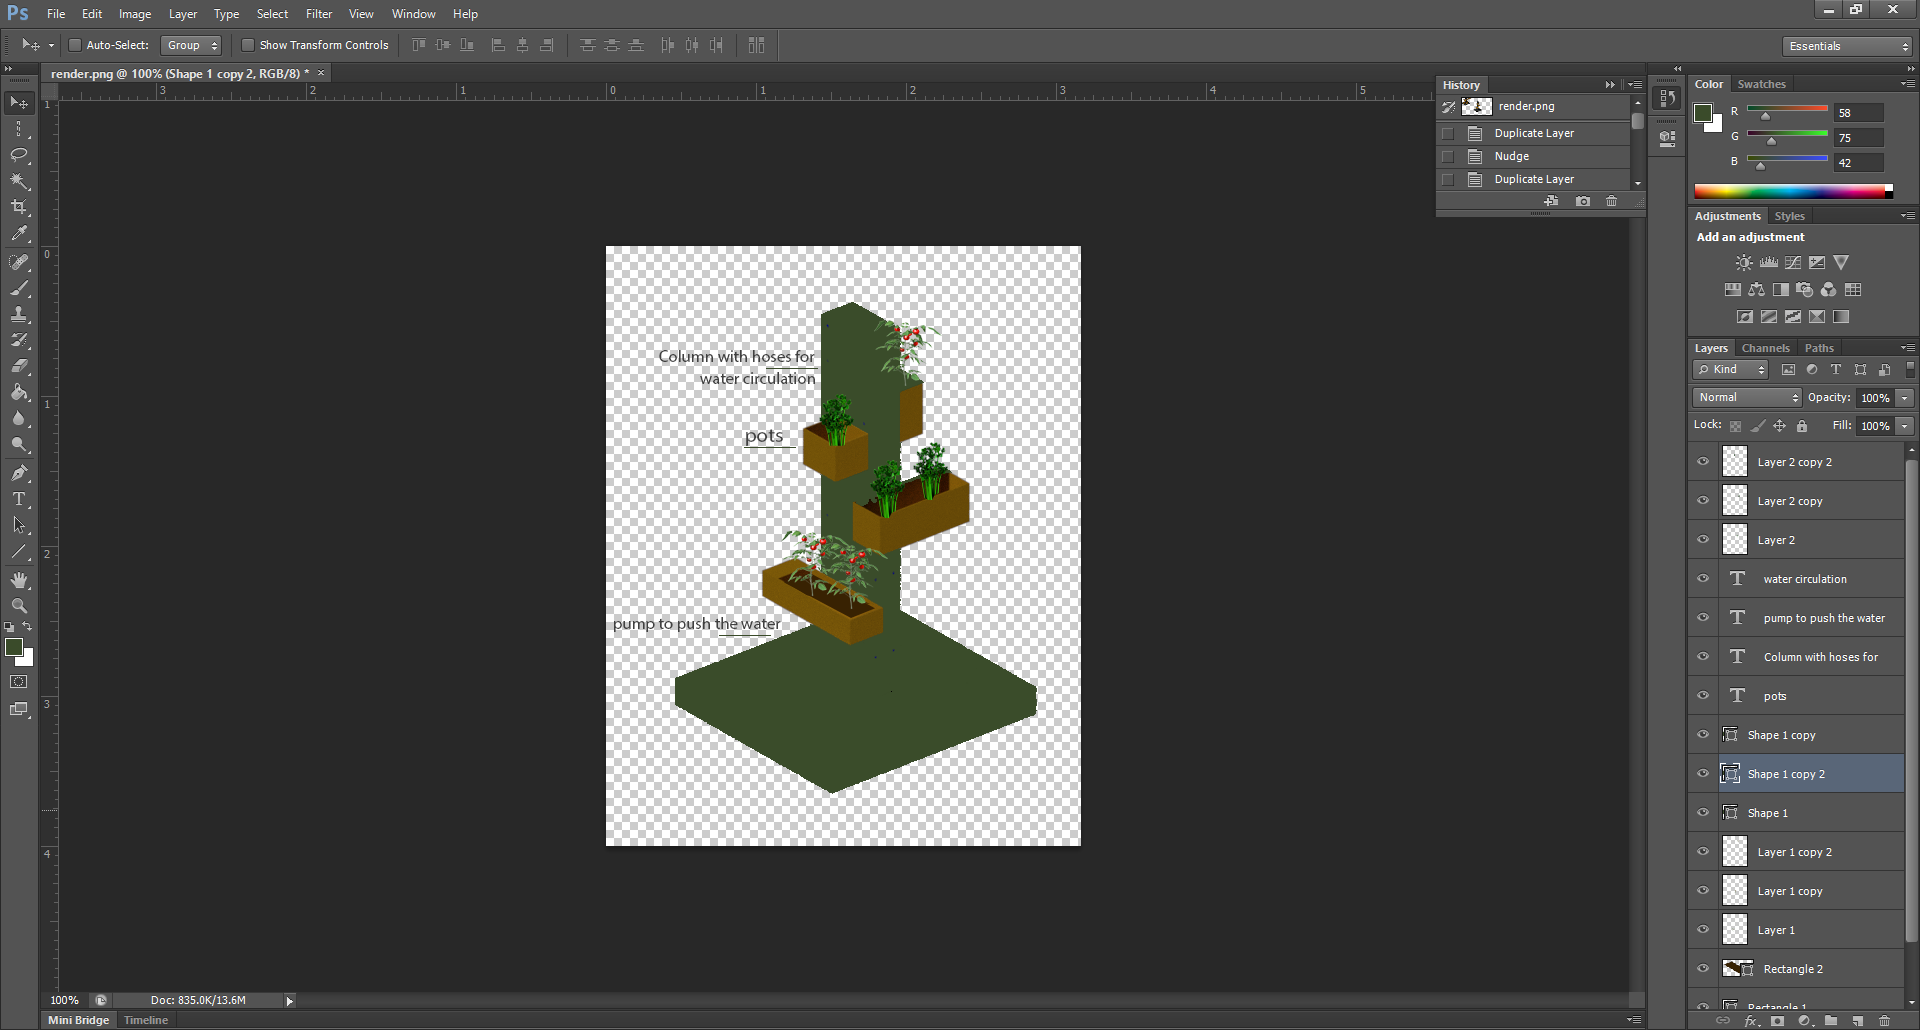
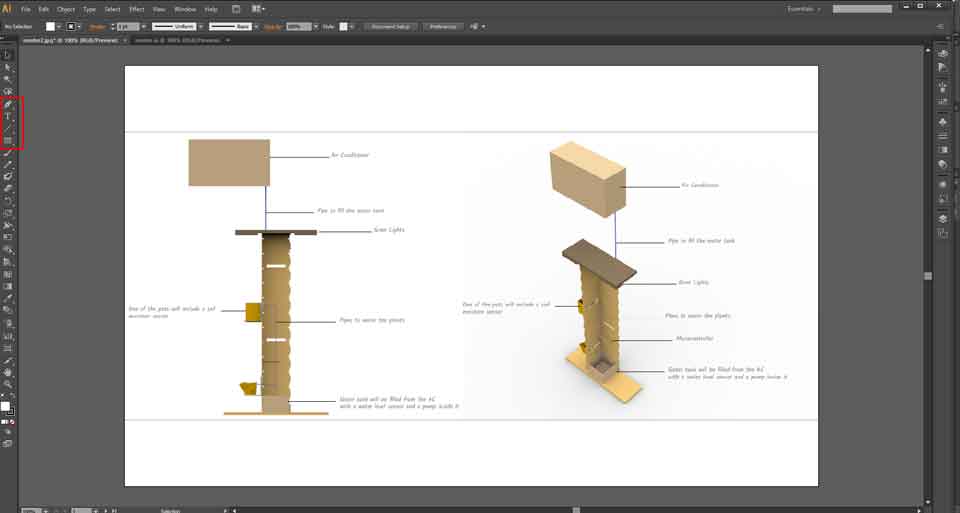
I took some perspective rendered views from AutoCAD saved as png then using photoshop I edited the images (crop, image size, adjustments).
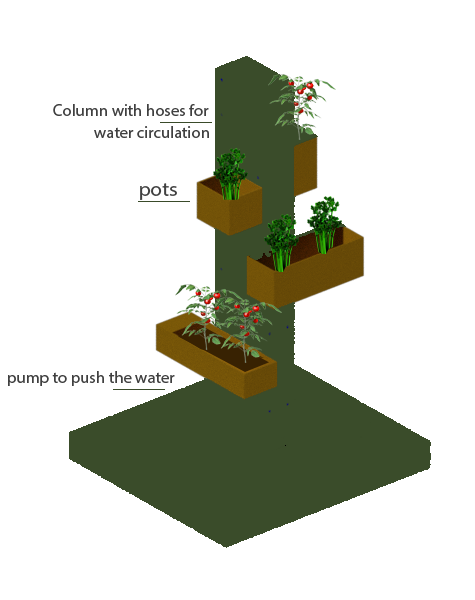
Second step I added some textures with 3D plants so that the rendered view can be seen as real life implementation of the project.
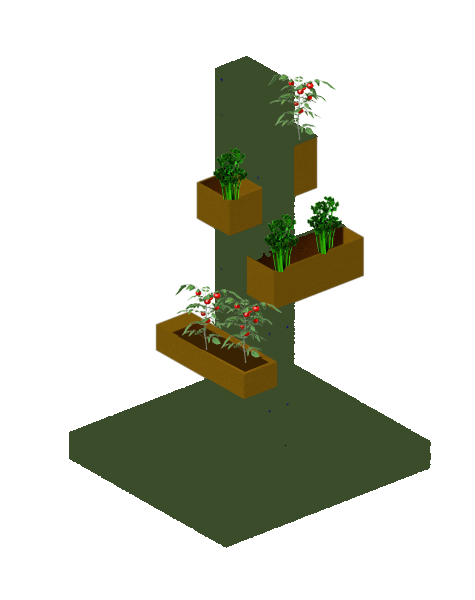
Finally I added some text to the second rendered view to show and explain the different parts of the project.
Developed Idea
After developing my idea I used AutoCAD again to develop the drawings using the same commands mentioned previously.
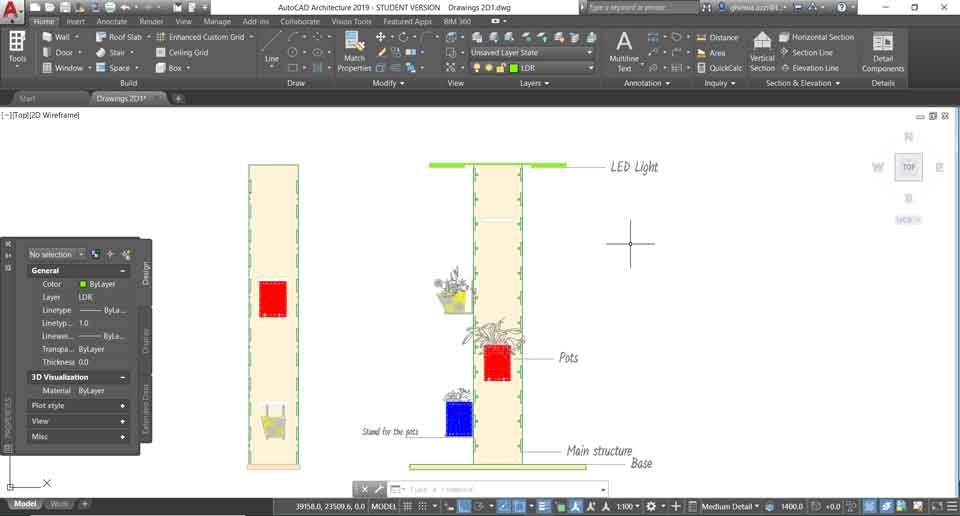
Here I added a solid hatch and inserted plants blocks with text to indicate each part of the project.
Step IV Rhinoceros
Rhinoceros 3D, is computer-aided design software. Rhinoceros geometry is based on the NURBS mathematical model, which focuses on producing mathematically precise representation of curves and freeform surfaces in computer graphics.Rhinoceros is used in processes of computer-aided design (CAD), computer-aided manufacturing (CAM), rapid prototyping, 3D printing and reverse engineering in industries including architecture, industrial design (e.g. automotive design, watercraft design), product design (e.g. jewelry design) as well as for multimedia and graphic design.
I developed my final idea in 3D using Rhinoceros software.
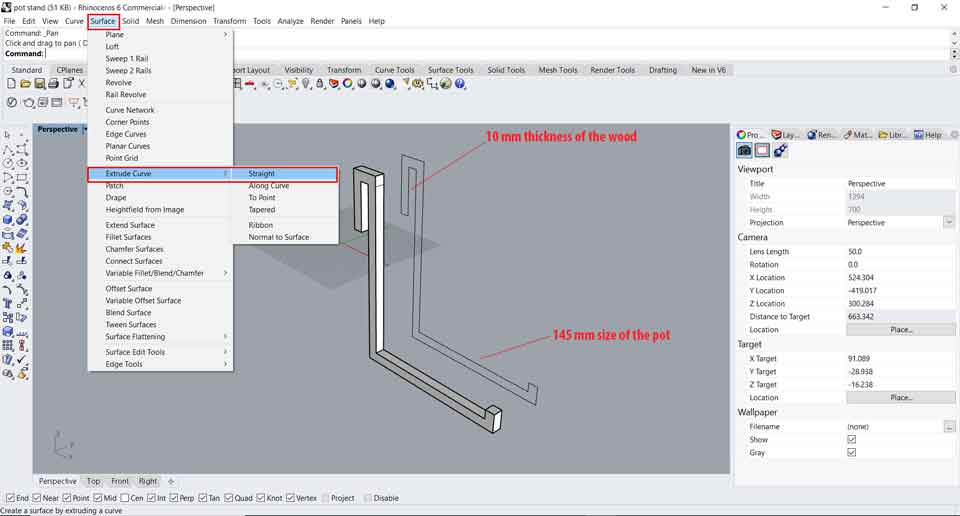
FirstI designed the pot stands to hang the pots. I started by drawing a polyline with the dimensions of the pot and the thickness of the wood I used.
Then I used the command extrudecrv to extrude the curve to have a solid model in order to 3D print it.
As for the main structure of the project I also used Rhino. I started by using the command polyline to draw the main shape with all the required dimensions with circles having the same diameter of the screws I am going to use.
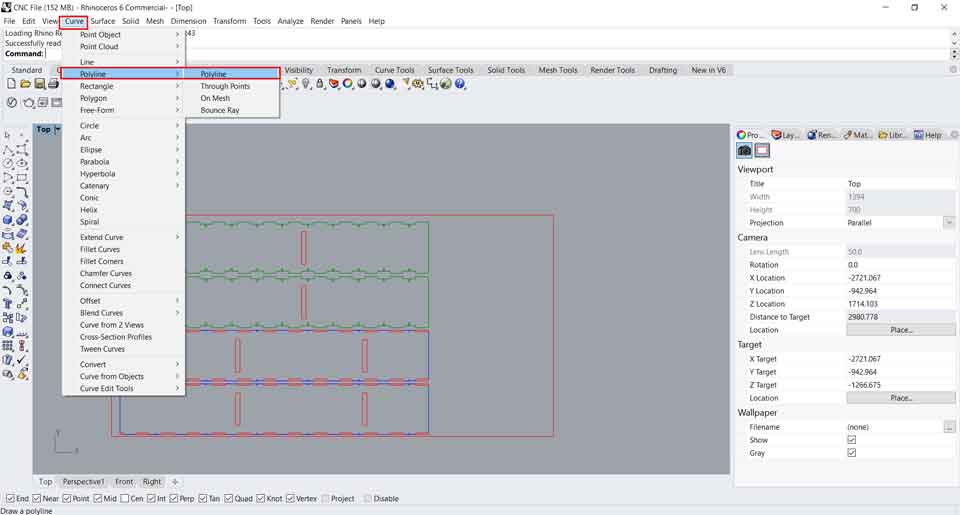
After having the main structure in 2D I used the same command extrudecrv to extrude the 2D polyline into a 3D polysurface.
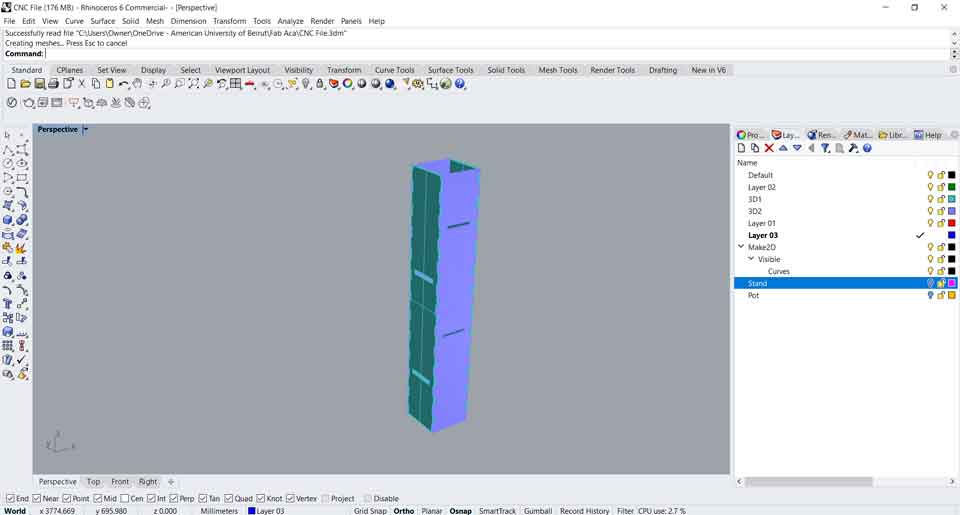
Then I inserted the pot stands and the pots that I designed to have a complete project in one file so I can visualize it.
Then I assigned different colors in the rendered option so the project can be clearly viewed and took a render of it.

Step V Adobe Illustrator
Adobe Illustrator is a software application for creating drawings, illustrations, and artwork. Adobe Illustrator is used to create a variety of digital and printed images, including cartoons, charts, diagrams, graphs, logos, and illustrations.
After I did the render on Rhino I saved the image and opened it in Illustrator. In this way I traces using the pen tool the shape of the pipe and how it is going from the air conditioner to the tank and from the tank to the pots.
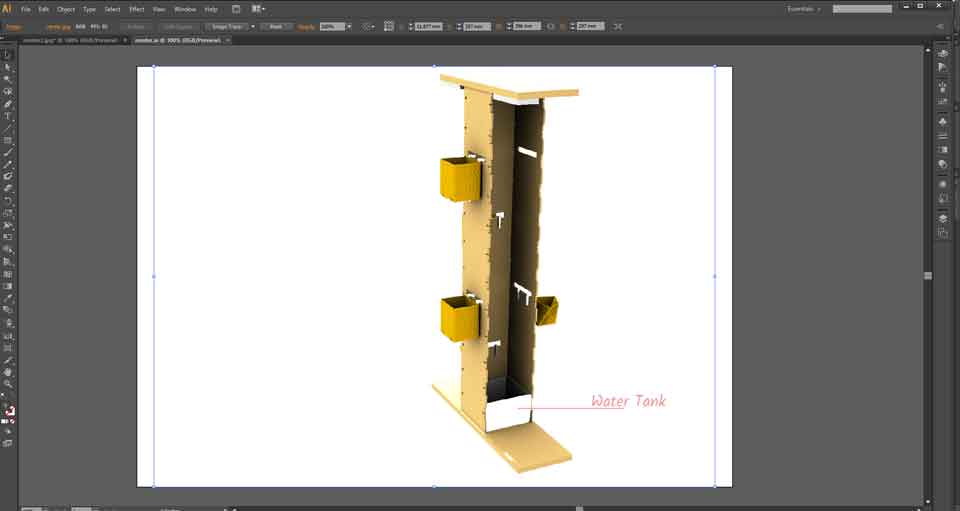
Then I added text to indicate the parts of the project.
After using these softwares I created a clear ideas of my final project and its different parts:
Water tank
Pots
Main structure
Controller
In this exerciseIn Fusion 360 I 3D modeled the basic idea of the project each part alone then combined to view it in 3D.
In AutoCAD I drew the project in 2D with dimensions and hatches with text to explain the project.
IN Rhinoceros 3D I did the final 3D model with all the entities and rendred it.
In Adobe Photoshop and Illustrator I took 3D rendered shots and added some plants and textures to visualize the project with text.

This work is licensed under a Creative Commons Attribution-NonCommercial-ShareAlike 4.0 International License